Natural Egg Dyeing
Translation missing: en.blogs.article.author_on_date_html
Living
Natural Egg Dyeing
February 15, 2016
I am always on the hunt for great natural dyeing kits that will make beautiful, vibrant eggs – but they always seem to come up short. So this year, I called on my sister Saree’s good friend and ethnobotanist, Deepa Preeti Natarajan. I featured some of Deepa’s wonderful tips and tricks for naturally dyeing fabrics in a previous post, and was thrilled when she agreed to share the same for dyeing eggs. I am so excited to not only try out all of her suggestions with my little ones, but also to make it a tradition in our home. I hope you enjoy her instructions, below. XXJKE
DPN: Dyeing Easter eggs with plants is a tradition I look forward to each year at the Botanical Garden where I work. Dyeing eggs with plants can be a fun, rewarding and beautiful activity to share with friends and family. There are so many ways to embellish and color eggs, and I have found that many countries each have their own way of decorating eggs for spring. Here, I will share a few of my favorite ways that are easy to do at home and with children.
What I love most about using all edible materials is that dyeing eggs becomes a totally safe and healthy activity, and you can feel great about eating the eggs afterward. Using natural dyes with eggs is also a wonderful way to engage children with the many uses plants have – for food, color, medicine, and more.
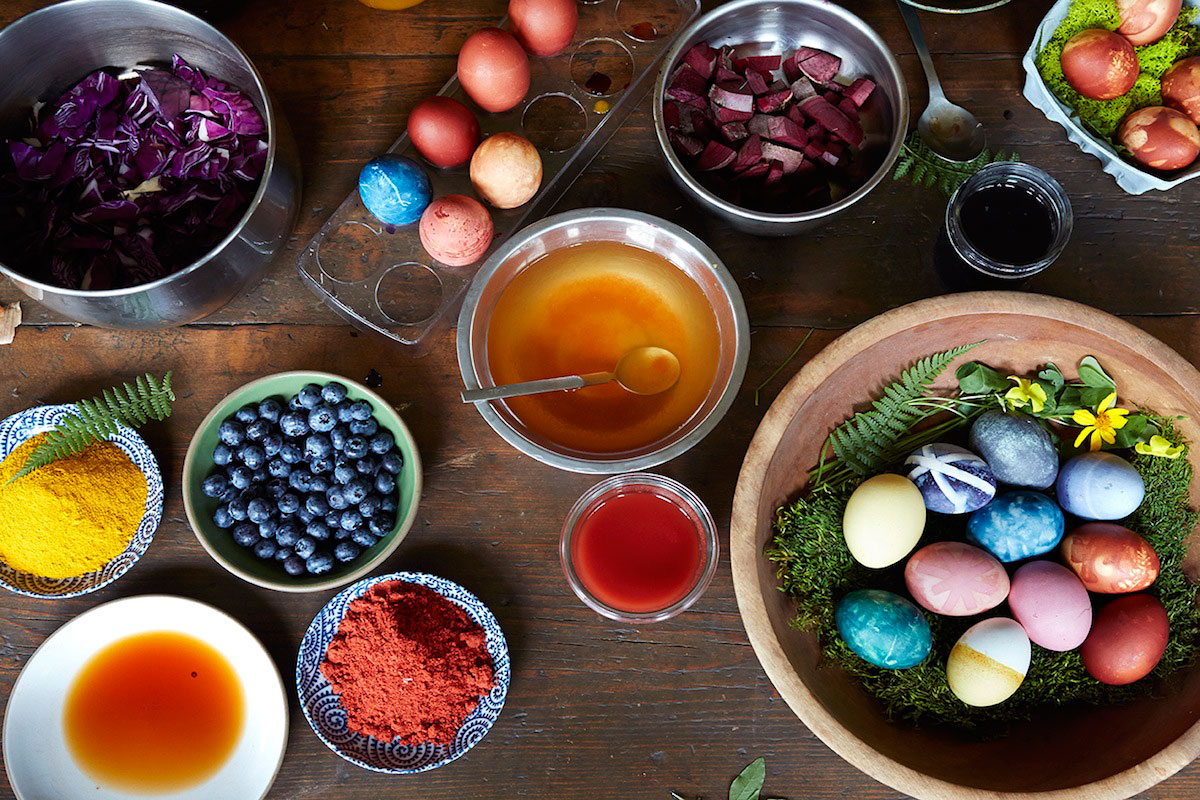
For all of these natural dyes, the longer the eggs can sit in the jars, the deeper the color will be. Some of the dyes such as the beets, blueberry and turmeric can get a dip and you will see beautiful colors immediately. Others require more time 1-5 minutes, some 20 minutes (onion skins) and some overnight (purple cabbage) for the best colors. Another tip: prepare your eggs and dyes a day ahead of time, to make the process as easy and rewarding as possible.
Some of my favorites for naturally dyeing eggs:
Onion Skins
Onion skins have to be one of the easiest and most vibrant natural dyes. They produce deep rich golden colors, almost in the realm of deep reds. With onion skins, I boil the eggs at the same time that I dye them.
Gather a large produce bag full of onion skins (I glean the onion bin at my local grocery store). Put your uncooked eggs in the pot with the onion skins and allow to boil together for about 25 minutes.
To create beautiful leaf patterns and organic forms on your eggs, you can gather some leaves from your garden – ferns work really well, but you could also use clover, maple, grape, California poppy leaves, blades of grass, or anything you find, even herbs like parsley or cilantro. Take a nice full onion skin in your hand, lay a leaf onto the onion skin, and place an egg on top. Wrap the egg, leave and onion skin in cheese cloth and secure with a piece or string. Place into the same pot you use for the solid onion skin dyed eggs. This will give you lovely natural variation. If you would like more distinctive leaf shapes, you can use knee-high pantyhose to secure the bundle in place of the cheesecloth and the leave will be pressed more firmly onto the egg to make a cleaner resist.
When working with kids, I suggest starting off with the onion skins, so that the other eggs can be dyed while the onion skin eggs are boiling up.
Purple Cabbage
Purple cabbage makes beautiful deep blues on eggs, but you have to be patient with this one. The most fabulous results come from leaving your eggs in the dye overnight.
Chop one small head of cabbage into fine pieces. Add to some water and boil up for about 25 minutes until you see the water change to a deep purple color. Add one tablespoon of white vinegar. Take off of heat and add your eggs. I like to leave the cabbage leaves in the pot to get more texture on the eggs, but you could also strain out the liquid and submerge your eggs in this liquid over night.
Beets
Beets give lovely pink shades to Easter eggs. Take about 2 bunches of beets and chop into small pieces. Boil for about 30 minutes until liquid is reduced and a deep magenta color. Remove from heat and add to a nice glass jar or bowl for dyeing. Add 1 tablespoon of white vinegar and this dye is ready to go.
Turmeric
Turmeric is one of the easiest dyes. It is best to simmer the turmeric with water for just a bit so that the powder becomes more dissolved. (You can use 1/2 cup of turmeric.) You can get lovely shades by doing multiple dips in the turmeric dye. Simply place the egg in the turmeric dye, and let sit for 30 seconds. Remove, and then re-dip for another 30 seconds. Repeat until you have your desired color.
For a nice teal/green color. I dipped my cabbage dyed egg into turmeric and let it sit for a couple of minutes.
Blueberries
One of the strongest colors for dyes. I used two pints of blueberries and simmered them down with water for about 35 minutes. (You want a syrupy texture.) Strain out the berries and put liquid into a jar that will work well for dyeing. No vinegar is needed for the blueberries – you can dip your hardboiled eggs directly into this dye.
Other Dyes
You can also experiment with hibiscus, tea, and coffee for natural dyes. On the web, you may find that spinach makes a nice green, but in my experience it has never worked. In addition to blueberries, other berries, such as blackberries, also work well.
Some great techniques for adding design and dimension to your eggs:
Resist Techniques
In these photos, I used thin Japanese Washi Tape to make patterns on my eggs. You can use any type of sticker, or cut out shapes in masking tape, then place on your eggs before you dip them into the dye. You can also take one of your dyes and add some vegetable oil to make marbled effects on your eggs. Some other fun techniques for kids: wrap your eggs with string or rubber bands, or draw on the eggs with crayons before dipping into the dye (there are a handful of great “vegetable” crayons made from natural dyes out there).
Overdyeing
You can have lots of fun making a range of colors by dying your eggs with multiple colors. You can build up layers and colors by doing this: dye your egg in the color of your choice, remove from the dye and add tape in whatever patterns you’d like, then dip into another dye. Then, remove the tape and add a new layer by dipping into a third dye – you’ll be left with a triple colored egg, which is loads of fun to do.
For more information, you can always contact me @ deepa@plantspeople.org or visit my website. Have fun!
All photos by Aya Brackett Photography.